
Seed Starting Indoors: Essential Tips for Successful Indoor Gardening
Starting seeds indoors can be a rewarding experience for any gardener. By following simple steps and providing the right conditions, you can successfully germinate seeds well before the outdoor planting season begins. This early start not only allows for a longer growing period but also gives your plants a stronger chance of thriving once they are moved outside.
To begin, it’s essential to choose the right containers and soil. Using small, individual containers ensures that each seedling has enough space and nutrients to grow. A good seed-starting mix will retain moisture while allowing for proper drainage, setting your seeds up for success. You’ll also need to keep the seeds warm and maintain humidity, creating an ideal environment for growth.
With a few basic supplies and knowledge, you can cultivate a vibrant garden right from your home. The process of seed starting indoors opens up new possibilities and can enhance your abilities as a gardener. After all, nothing beats the satisfaction of watching your seedlings grow and flourish.
Essentials of Seed Starting Indoors
Starting seeds indoors requires careful planning and specific supplies. The right choices can lead to healthy plants that thrive when transplanted outdoors. Here are the key essentials to make your indoor seed starting successful.
Choosing the Right Seeds
Select seeds that are suitable for your growing zone and the time of year. Look for varieties labeled as good for indoor starting. Popular options include tomatoes, peppers, and herbs. Always check the seed packet for specific planting guidelines.
It’s helpful to consider the growth rate and space needed. Some plants grow faster and may need less time inside, while others can take longer. Researching your chosen seeds will ensure they are a good match for your indoor environment.
Timing for Seed Starting
Timing plays a crucial role in successful seed starting. Most seeds need to be planted indoors 6 to 8 weeks before the last expected frost date in your area.
Use a calendar to mark important dates. Pay attention to each type of seed, as they can vary. Check germination times and growth needs for your chosen plants to ensure they’re strong when it’s time to move them outside.
A heat mat can provide consistent warmth to help seeds sprout faster.
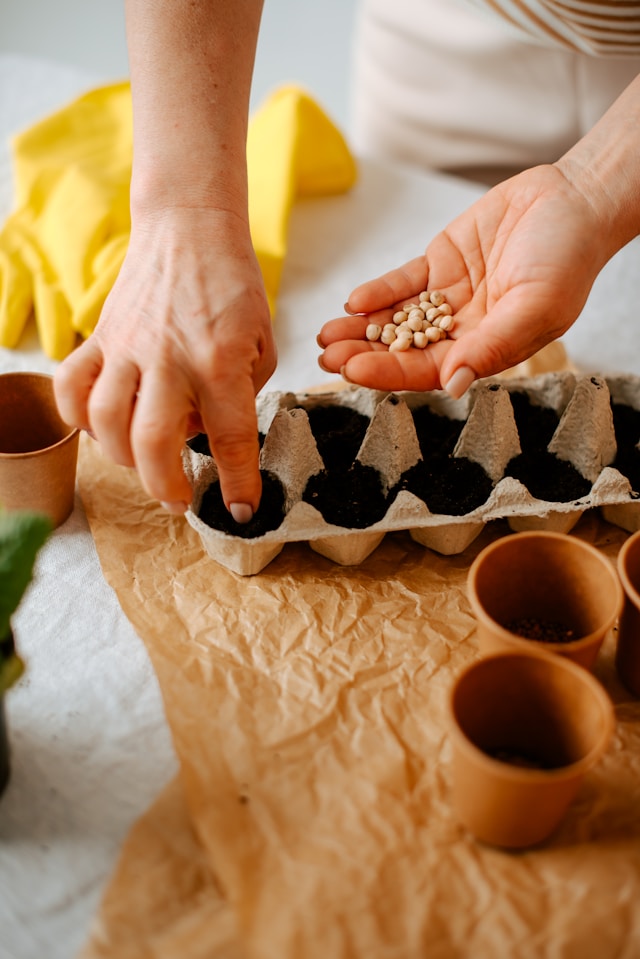
Selecting Containers and Trays
You need suitable containers to start your seeds indoors. Seed trays, pots, or recycled containers can work well. Make sure they have drainage holes to prevent water from pooling.
Using seedling trays with cells is recommended, as each seedling gets its own space. It makes transplanting easier. If you’re using larger pots, you can plant multiple seeds per container but thin them later to keep only the strongest.
A clear cover can maintain humidity, which is beneficial for germination.
Soil and Medium Preparation
Good soil is essential for healthy seedlings. Use a seed-starting mix that is light and well-draining. Avoid regular garden soil as it can be too heavy and may contain pests or diseases.
Moisten the soil before filling your containers. Make sure it feels like a damp sponge but not too wet. Fill your containers to the top and level the surface, ready for planting.
You can also consider adding a light fertilizer once the seedlings have true leaves. This will provide them the nutrients they need to grow strong.
Seedling Care and Management
Caring for your seedlings is crucial for their healthy growth and successful transplanting. Proper attention to lighting, watering, temperature, humidity, and nutrition will help your seedlings thrive.
Lighting Requirements
Seedlings need plenty of light for strong growth. Aim for 12 to 16 hours of light each day. If natural light is insufficient, consider using grow lights.
- Type of Light: Full-spectrum LED lights or fluorescent tubes are good options.
- Distance: Place lights 2 to 4 inches above the seedlings to prevent stretching.
- Rotation: Rotate the trays every few days to ensure even light exposure.
Watch for signs of poor lighting, such as leggy or pale seedlings. Adjust the light as necessary to keep your plants healthy.
Watering Techniques
Watering requires attention to detail. Consistency is key but avoid overwatering, which can lead to root rot.
- Moisture Level: Keep the soil moist but not soggy. Use your finger to check the top inch of soil.
- Method: Water from the bottom by placing trays in a shallow water dish. This helps seedlings absorb moisture.
- Frequency: Water when the soil feels dry. This will vary based on humidity and temperature.
Adjust your watering routine as seedlings grow larger, as they will need more water as they develop.
Temperature and Humidity Control
Maintaining the right temperature and humidity is essential for seedling health.
- Temperature: Keep temperatures around 70°F to 75°F during the day. At night, it can drop to 60°F to 65°F.
- Humidity: High humidity (around 50% to 70%) is ideal. Covering your seedlings with plastic domes can help maintain moisture in the air.
- Circulation: Ensure proper air circulation to prevent mold growth. A small fan can help with this.
Monitor conditions regularly and adjust based on your seedlings’ responses.
Fertilizing Seedlings
Seedlings require nutrients to grow strong and healthy. However, they are sensitive to fertilizers.
- Timing: Start fertilizing when your seedlings develop their first true leaves.
- Type of Fertilizer: Use a diluted, balanced fertilizer with an N-P-K ratio like 10-10-10. Dilute it to quarter strength to avoid burning the roots.
- Frequency: Fertilize every 2-3 weeks. Follow the manufacturer’s instructions for amounts.
Watch your seedlings for signs of nutrient deficiency, such as yellowing leaves.
Thinning and Transplanting
As seedlings grow, thinning and transplanting are crucial steps.
- Thinning: Thin out the weaker seedlings to give stronger ones space. Leave only the healthiest seedling in each cell or pot.
- Transplanting: When seedlings have 2-3 sets of true leaves, they are ready for transplanting. Dig carefully to avoid damaging roots.
- Preparation: Harden off your seedlings by gradually exposing them to outdoor conditions over 7-10 days before transplanting.
Use these techniques to ensure your seedlings grow into strong plants ready for the garden.